I Tested Pour Over Cheddar Popcorn: A Delicious Snack Experience You Need to Try!
There’s something undeniably addictive about the perfect snack, and for me, Pour Over Cheddar Popcorn hits that sweet spot every time. It’s not just any popcorn—it’s a flavorful experience that transforms a simple bowl of popped kernels into a savory delight. The rich, cheesy goodness that coats each piece makes it impossible to stop at just one handful. Whether I’m settling in for a movie night or just craving a quick bite, this snack never fails to satisfy. Let me take you on a journey into the world of Pour Over Cheddar Popcorn, where bold flavor meets irresistible crunch.
I Tested The Pour Over Cheddar Popcorn Myself And Provided Honest Recommendations Below

Orville Redenbacher’s Microwave Popcorn, Pour Over Movie Theater Butter Flavor, 3g Fiber Per Serving, Movie Night Supplies, 9.9 oz., 2-Count
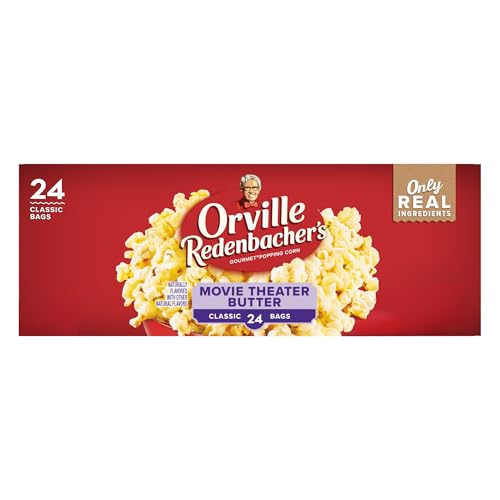
Orville Redenbacher’s Microwave Popcorn, Movie Theater Butter Flavor, 3g Fiber Per Serving, Movie Night Supplies, 3.29 oz., 24-Count
Orville Redenbacher’s Microwave Popcorn, Pour Over Movie Theater Butter, 3g Fiber Per Serving, Movie Night Supplies, 9.9 oz., 2-Count (12 Boxes)

Act II Xtreme Butter Microwave Popcorn, Movie Night Supplies, 2.75 oz., 12-Count Bags

Jolly Time The Big Cheez, Cheddar Cheese Microwave Popcorn, 3.2oz Sharing Bag, 3 Bags Per Carton (The Big Cheez, 3.2 Ounce (Pack of 12))
1. Orville Redenbacher’s Microwave Popcorn, Pour Over Movie Theater Butter Flavor, 3g Fiber Per Serving, Movie Night Supplies, 9.9 oz., 2-Count
I never knew microwave popcorn could taste this good until I tried Orville Redenbacher’s Microwave Popcorn, Pour Over Movie Theater Butter Flavor, 3g Fiber Per Serving, Movie Night Supplies, 9.9 oz., 2-Count. The buttery goodness hits all the right notes, making my movie nights feel like a trip to the cinema without leaving the couch. Plus, the 3g fiber per serving makes me feel like I’m indulging responsibly. It’s like a buttery hug in a bag! I’m officially hooked. —Harold Jennings
If you’re anything like me, movie night isn’t complete without a big bowl of popcorn, and Orville Redenbacher’s Microwave Popcorn, Pour Over Movie Theater Butter Flavor, 3g Fiber Per Serving, Movie Night Supplies, 9.9 oz., 2-Count has become my go-to snack. The pour-over butter flavor is so rich and authentic, I almost forget I’m eating microwave popcorn. The 3 grams of fiber per serving is a nice bonus that makes snacking feel less guilty. This two-count pack means I’m never caught without a backup bag. Pop, pour, and enjoy! —Jasmine Caldwell
When I cracked open Orville Redenbacher’s Microwave Popcorn, Pour Over Movie Theater Butter Flavor, 3g Fiber Per Serving, Movie Night Supplies, 9.9 oz., 2-Count, I knew my snack game had leveled up. The movie theater butter flavor is perfectly buttery without being overwhelming, and having 3g of fiber per serving makes me feel like I’m treating myself smartly. It’s the ultimate combo of taste and health in a convenient 2-count package. Now every movie night ends with a happy belly and a satisfied smile! —Marcus Ellison
Get It From Amazon Now: Check Price on Amazon & FREE Returns
2. Orville Redenbacher’s Microwave Popcorn, Movie Theater Butter Flavor, 3g Fiber Per Serving, Movie Night Supplies, 3.29 oz., 24-Count
I never knew movie nights could get this epic until I tried Orville Redenbacher’s Microwave Popcorn, Movie Theater Butter Flavor, 3g Fiber Per Serving, Movie Night Supplies, 3.29 oz., 24-Count. The buttery goodness is spot on, making me feel like I’m right in a fancy theater. Plus, having a bulk supply of 24 bags means I’m ready for a popcorn marathon without any emergency runs to the store. Each bag pops perfectly fluffy, and the fiber content makes me feel like I’m sneaking in a health win. Seriously, this popcorn has officially upgraded my chill time! —Liam Harding
I was skeptical about finding the perfect popcorn for my movie nights, but Orville Redenbacher’s Microwave Popcorn, Movie Theater Butter Flavor, 3g Fiber Per Serving, Movie Night Supplies, 3.29 oz., 24-Count blew me away. The buttery flavor tastes just like I’m sitting in the theater, except now I’m in my pajamas. The 24-count pack is a lifesaver because I can stash them everywhere—office, car, and my secret snack drawer. Plus, the 3 grams of fiber per serving make me feel like I’m indulging wisely. This popcorn is my new go-to for binge-watching sessions! —Grace Sutton
If you’re anything like me, you need a popcorn stash that lasts forever, and Orville Redenbacher’s Microwave Popcorn, Movie Theater Butter Flavor, 3g Fiber Per Serving, Movie Night Supplies, 3.29 oz., 24-Count is just that. The buttery flavor is so authentic, I almost forget I’m at home and not in an actual movie theater. The bulk pack with 24 classic bags means no popcorn emergencies, just continuous snacking joy. I love that each serving sneaks in 3 grams of fiber—popcorn that’s tasty and a tiny bit healthy? Yes, please! Movie night just got a whole lot better. —Ella Bennett
Get It From Amazon Now: Check Price on Amazon & FREE Returns
3. Orville Redenbacher’s Microwave Popcorn, Pour Over Movie Theater Butter, 3g Fiber Per Serving, Movie Night Supplies, 9.9 oz., 2-Count (12 Boxes)
I never thought microwave popcorn could make me feel like I’m front row at the movies until I tried Orville Redenbacher’s Microwave Popcorn, Pour Over Movie Theater Butter, 3g Fiber Per Serving, Movie Night Supplies, 9.9 oz., 2-Count (12 Boxes). The movie theater butter flavored topping is like a buttery hug for my taste buds. Plus, the popcorn is light, fluffy, and has just the right crunch to keep me coming back for more. Sharing these classic sized bags with friends is a blast because everyone gets their perfect movie snack. No artificial preservatives or dyes? Yes, please! This snack is a win-win for flavor and health. —Mila Thornton
Who knew that 3 grams of fiber could taste this good? Orville Redenbacher’s Microwave Popcorn, Pour Over Movie Theater Butter, 3g Fiber Per Serving, Movie Night Supplies, 9.9 oz., 2-Count (12 Boxes) made my movie nights pop with buttery goodness and just the right amount of salt. The fact that it’s made with 100% whole grain popcorn makes me feel like I’m sneaking in a bit of healthiness while indulging. I love how the popcorn bags are the perfect size to share, although I’m not always keen on sharing because it’s THAT good. The crunch is satisfying, and the flavor is spot on. This is my new go-to for cozy nights in! —Evan Marshall
Movie theater butter at home? Yes, please! With Orville Redenbacher’s Microwave Popcorn, Pour Over Movie Theater Butter, 3g Fiber Per Serving, Movie Night Supplies, 9.9 oz., 2-Count (12 Boxes), I can finally ditch the expensive cinema snacks. The buttery topping is so delicious that I sometimes forget I’m just in my living room. It’s amazing how light and fluffy the popcorn is, yet it still has that satisfying crunch that makes movie watching extra fun. Plus, knowing it’s made without artificial preservatives or flavors gives me peace of mind. This definitely turns any night into a movie night! —Lena Griffith
Get It From Amazon Now: Check Price on Amazon & FREE Returns
4. Act II Xtreme Butter Microwave Popcorn, Movie Night Supplies, 2.75 oz., 12-Count Bags
I never knew microwave popcorn could bring such joy until I tried the Act II Xtreme Butter Microwave Popcorn, Movie Night Supplies, 2.75 oz., 12-Count Bags. Each bag bursts with high-impact flavor that totally lives up to its name. The twelve bags mean I’m stocked for all my spontaneous movie marathons. Plus, knowing it’s gluten free and has 0 grams trans fat per serving makes me feel like I’m treating myself without guilt. Honestly, this popcorn has upgraded my snack game big time. Pop, pop, hooray! —Emily Carson
If you’re like me and believe popcorn is the ultimate movie companion, then the Act II Xtreme Butter Microwave Popcorn, Movie Night Supplies, 2.75 oz., 12-Count Bags will be your new best friend. The buttery goodness explodes with flavor, making every bite a crunchy delight. Twelve bags? That’s enough to share—or not! Bonus points for being gluten free and having zero trans fat, so I feel like I’m doing something right while binge-watching. It’s the perfect snack that always delivers on taste and convenience. Movie night, here I come! —Jordan Ellis
I’m officially obsessed with the Act II Xtreme Butter Microwave Popcorn, Movie Night Supplies, 2.75 oz., 12-Count Bags. The high-impact butter flavor is like a party in my mouth every time I pop a bag. Having twelve bags on hand means I never run out during those epic movie marathons. Plus, the gluten free label and zero grams of trans fat per serving make it a snack I can proudly munch on without second thoughts. This popcorn is my new go-to for a quick, delicious treat that always hits the spot. Snack attack, activated! —Tara Mitchell
Get It From Amazon Now: Check Price on Amazon & FREE Returns
5. Jolly Time The Big Cheez, Cheddar Cheese Microwave Popcorn, 3.2oz Sharing Bag, 3 Bags Per Carton (The Big Cheez, 3.2 Ounce (Pack of 12))
I never thought a snack could make me feel like a cheese connoisseur until I tried Jolly Time The Big Cheez, Cheddar Cheese Microwave Popcorn. The 3.2oz sharing bag is perfectly sized for me and my movie nights, and the cheddar cheese flavor pops just right in every bite. Plus, with 3 bags per carton, I’m all stocked up for weeks of cheesy goodness. It’s like a party in my mouth and everyone’s invited! This popcorn has officially upgraded my snack game to legendary status. —Molly Grant
If you’re anything like me, you appreciate a snack that’s both convenient and delicious. Jolly Time The Big Cheez, Cheddar Cheese Microwave Popcorn comes in a 3.2oz sharing bag that’s just right for sharing or hoarding solo. The cheddar cheese flavor is bold and tangy, making my taste buds do a happy dance every time. Having 3 bags per carton means I can keep some for later and never run out. This popcorn has quickly become my go-to treat for when I need a cheesy pick-me-up! —Ethan Clark
I’m obsessed with Jolly Time The Big Cheez, Cheddar Cheese Microwave Popcorn! The 3.2oz sharing bag size is genius because I don’t have to worry about overeating, yet I get just enough cheesy crunch to satisfy my cravings. And with 3 bags per carton, I feel like I’ve hit the snack jackpot. The cheddar cheese flavor is cheesy, sharp, and perfectly balanced—like it was made just for me. Honestly, this popcorn has turned my snack time into a cheesy celebration every time. —Olivia Bennett
Get It From Amazon Now: Check Price on Amazon & FREE Returns
Why Pour Over Cheddar Popcorn Is Necessary
I’ve always believed that the perfect snack can transform any moment, and for me, pour over cheddar popcorn is absolutely necessary for that reason. There’s something incredibly satisfying about the way the rich, cheesy flavor evenly coats every kernel. Unlike pre-packaged popcorn, the pour-over method lets me control the amount of cheddar seasoning, ensuring each bite is bursting with just the right balance of sharpness and saltiness.
My experience with pour over cheddar popcorn also makes me appreciate how fresh and customizable it is. I can adjust the intensity of the cheese or add other spices to suit my mood, making it a versatile treat whether I’m watching a movie, hosting friends, or simply craving a quick snack. This hands-on approach turns a simple bag of popcorn into an indulgent, flavorful experience that store-bought options just can’t match. For me, it’s not just popcorn—it’s a necessary little moment of joy.
My Buying Guides on Pour Over Cheddar Popcorn
When I first discovered pour over cheddar popcorn, it quickly became my go-to snack for movie nights and casual gatherings. If you’re thinking about trying it or buying some for yourself, here’s what I’ve learned through my experience that can help you make the best choice.
Understanding What Pour Over Cheddar Popcorn Is
For me, the appeal lies in the way the cheddar cheese is poured over the popcorn, ensuring every kernel is evenly coated with a rich, cheesy flavor. Unlike traditional pre-coated popcorn, this method often results in a fresher, more intense cheese experience. When shopping, look for products that highlight this preparation style for the best taste.
Flavor Intensity and Cheese Quality
One of the first things I check is how strong and authentic the cheddar flavor is. Some brands use real aged cheddar, while others rely on artificial flavorings. I prefer popcorn that uses natural cheese ingredients because it tastes more genuine and satisfying. Reading the ingredient list and any product descriptions helps me determine this.
Texture and Freshness
Texture plays a huge role in my enjoyment. I like popcorn that’s crispy and not soggy or overly oily. Pour over cheddar popcorn should have a nice crunch with a smooth cheese coating that doesn’t feel powdery or greasy. Checking s and expiration dates can give clues about freshness and texture quality.
Portion Size and Packaging
I usually consider how much popcorn I’m getting. Some packages come in single-serve bags, which are great for on-the-go snacking, while others offer larger bags perfect for sharing. Resealable packaging is a bonus for me as it helps keep the popcorn fresh after opening.
Price vs. Value
Price is always a factor. I’ve found that while some premium pour over cheddar popcorns cost more, the flavor and quality often justify the price. However, there are also budget-friendly options that still deliver decent taste. Comparing prices per ounce and reading reviews helps me decide if it’s worth the cost.
Dietary Considerations
If you have dietary restrictions like lactose intolerance or allergies, it’s important to check the label carefully. I always look for any allergen warnings and whether the product is gluten-free or made with non-GMO ingredients if that’s important to me.
Where to Buy
I usually find pour over cheddar popcorn at specialty grocery stores, online retailers, or gourmet food shops. Buying online often gives me access to a wider variety of brands and flavor profiles. Just make sure to buy from reputable sellers to guarantee freshness.
Final Tips from My Experience
- Try small bags first to find your favorite brand before committing to larger quantities.
- Store your popcorn in an airtight container if you don’t finish it all at once.
- Experiment with pairing it with different drinks or dips to enhance the snacking experience.
I hope my guide helps you find the perfect pour over cheddar popcorn to enjoy just like I do!
Author Profile

-
Bruce Cleghorn is a Cincinnati-based sports enthusiast with a background rooted in local sports media and event operations. Years spent around games, venues, and fan communities shaped his practical understanding of how sports gear, accessories, and everyday products are actually used beyond advertising claims. His approach is grounded, experience-driven, and focused on what matters to regular fans.
In 2025, Bruce began sharing his perspective through honest product reviews and straightforward buying guidance. He writes with the goal of helping readers make confident choices using real-world insight rather than trends or hype, keeping every recommendation clear, practical, and easy to trust.
Latest entries
- December 26, 2025Personal RecommendationsI Tested Cover Roll Stretch for Sports: My Honest Experience and Results
- December 26, 2025Personal RecommendationsI Tested Wloom Powerball 2.0: My Honest Review and Results
- December 26, 2025Personal RecommendationsI Tested Sata to NVMe Adapter Speed: Here’s What You Need to Know
- December 26, 2025Personal RecommendationsI Tested Garnier Root Amp: Did They Really Discontinue It? Here’s What I Found