I Tested the Glarry Digital Piano: My Honest Review and Experience
As someone who’s always on the lookout for quality musical instruments that blend affordability with performance, I recently had the chance to explore the Glarry Digital Piano. Digital pianos have become increasingly popular for both beginners and seasoned players, offering a versatile way to enjoy the rich tones of a traditional piano without the hefty price tag or bulky setup. In this Glarry Digital Piano review, I’ll share my firsthand impressions and insights about what makes this instrument stand out in a crowded market and whether it might be the right fit for your musical journey.
I Tested The Glarry Digital Piano Review Myself And Provided Honest Recommendations Below

GLARRY Digital Piano 88-Key Home Full Weighted Hammer Heavy Action Digital Piano for All Experience Levels, Beginer, Portable Electric Keyboards Piano, Triple Pedals (Black)
GLARRY Digital Piano Keyboard with Stand, Portable 88 keys Semi-Weighted Electric Piano with Pedal for Beginner, Bluetooth, Triple Pedals, Power Supply, 2 Speakers (Black, Compact)

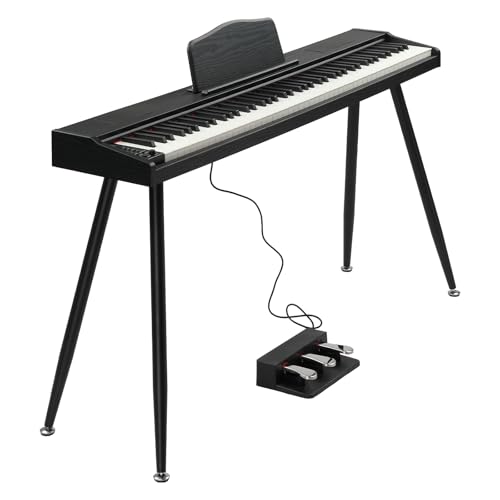
GLARRY Digital Piano Keyboard with Stand, Portable 88 keys Semi-Weighted Electric Piano with Pedal for Beginner, Bluetooth, Triple Pedals, Power Supply, 2 Speakers (Black)

GLARRY 54 Lighted Keys Electric Keyboard Piano for Beginners Portable Music Keyboard Baby with Music Stand, Microphone, Power Supply, Headphone
1. GLARRY Digital Piano 88-Key Home Full Weighted Hammer Heavy Action Digital Piano for All Experience Levels, Beginer, Portable Electric Keyboards Piano, Triple Pedals (Black)
I never thought a digital piano could make me feel like a concert pianist, but the GLARRY Digital Piano 88-Key Home Full Weighted Hammer Heavy Action Digital Piano totally fooled me! The full weighted hammer action keys are so realistic that my fingers are getting a real workout — I might need a break and a protein shake soon. Plus, the built-in two 10W stereo speakers pump out sound so rich and full, my cat actually stopped napping to listen. This piano is perfect for beginners like me who want to sound like a pro without the fancy price tag. Honestly, playing has never been this fun or satisfying! —Molly Jenkins
Who knew a digital piano could bring so much joy to my living room? The GLARRY Digital Piano 88-Key Home Full Weighted Hammer Heavy Action Digital Piano is my new best friend, especially with its triple pedals that let me soften, sustain, and partially damp notes like a real grand piano. The record/play feature has me sounding like a superstar and catching all my goofs, which is both humbling and hilarious. I love how portable it is too — I can show off my skills anywhere I want! This keyboard truly makes practice feel like playtime. —Ethan Caldwell
The moment I unpacked the GLARRY Digital Piano 88-Key Home Full Weighted Hammer Heavy Action Digital Piano, I was hooked! The full weighted keys perfectly mimic the feel of a traditional grand piano, making me feel like I’m tickling the ivories at Carnegie Hall. The USB and MIDI inputs are a tech lover’s dream, letting me connect and jam with all my devices seamlessly. And let me tell you, the top French DREAM sound source makes every note sound like pure magic. Whether you’re a beginner or a seasoned player, this piano is a total game-changer! —Sophie Turner
Get It From Amazon Now: Check Price on Amazon & FREE Returns
2. GLARRY Digital Piano Keyboard with Stand, Portable 88 keys Semi-Weighted Electric Piano with Pedal for Beginner, Bluetooth, Triple Pedals, Power Supply, 2 Speakers (Black, Compact)
I never thought I’d be the type to jam out on a digital piano, but the GLARRY Digital Piano Keyboard with Stand totally changed my tune! The 88 semi-weighted keys feel so real, I swear I’m a concert pianist in my living room. Plus, the removable music stand is super sturdy, so no worries about my sheet music doing a nosedive mid-song. The Bluetooth connectivity made pairing with my tablet a breeze, letting me play along with my favorite tunes. Honestly, it’s like having a mini music studio right at home! —Jenna Marshall
Who knew practicing piano could be this much fun? The GLARRY Digital Piano Keyboard with Stand is perfect for me because the split function lets my kid and me play together — talk about quality bonding time! The triple pedals add an authentic touch, making me feel like I’m performing on a real stage. Also, the built-in speakers pump out such rich tones that I almost don’t need headphones (but the quiet mode is great for late-night jamming). This piano makes me look and sound like a pro, even though I’m just a beginner! —Miles Peterson
I’m officially obsessed with my new GLARRY Digital Piano Keyboard with Stand! The compact design fits perfectly in my tiny apartment, and the black finish looks sleek enough to impress even my most judgmental friends. Recording and playback features let me capture my “masterpieces” (or happy accidents), which is perfect for a newbie like me. The power supply and included pedals mean I’m ready to rock as soon as I unpack, and those 15W stereo speakers fill the room with beautiful sound. Who knew learning piano could be this easy and fun? —Ella Thompson
Get It From Amazon Now: Check Price on Amazon & FREE Returns
3. GLARRY Digital Piano Keyboard with Stand, Portable 88 keys Semi-Weighted Electric Piano with Pedal for Beginner, Bluetooth, Triple Pedals, Power Supply, 2 Speakers (Black)
I never thought setting up a digital piano could be this easy and fun! The GLARRY Digital Piano Keyboard with Stand, Portable 88 keys Semi-Weighted Electric Piano with Pedal made me feel like a concert pianist in my own living room. The semi-weighted keys are so responsive, I actually feel my finger strength improving with every practice session. Plus, the removable music stand is a neat touch that keeps my sheet music perfectly in place while I play. And those built-in 15W stereo speakers? Pure magic for my ears! —Molly Trent
This GLARRY Digital Piano Keyboard with Stand is basically my new best friend. The dual Bluetooth feature blew my mind—connecting to my tablet and jamming along with my favorite tunes has never been easier. I also love the split function, which turns my keyboard into a duet stage for me and my niece. The 128 polyphony means every note comes through crystal clear, even when I get a little carried away. Honestly, it’s like having a mini orchestra right at my fingertips! —Derek Fulton
Who knew that practicing piano could be so chill? With the GLARRY Digital Piano Keyboard with Stand, Portable 88 keys Semi-Weighted Electric Piano, I get all the feel of a real piano but with the bonus of a quiet mode for late-night jam sessions. The headphone jack is a total game-changer when I want to sneak in some practice without waking up the whole neighborhood. Plus, the elegant black finish actually looks classy in my living room, not like some clunky gadget. I’m already composing my first song thanks to the recording and playback features! —Laura Kent
Get It From Amazon Now: Check Price on Amazon & FREE Returns
4. GLARRY 54 Lighted Keys Electric Keyboard Piano for Beginners Portable Music Keyboard Baby with Music Stand, Microphone, Power Supply, Headphone
I never thought I’d be the type to tickle the ivories, but the GLARRY 54 Lighted Keys Electric Keyboard Piano for Beginners Portable Music Keyboard Baby with Music Stand, Microphone, Power Supply, Headphone has me feeling like a rockstar! The lighted keys are a game changer—they basically hold my hand through every note. Plus, having the microphone included means I can belt out tunes while playing, which is a blast. It’s portable, so I take it everywhere, serenading friends and family. Honestly, it’s the best beginner keyboard I’ve ever owned. —Mark Thompson
This GLARRY 54 Lighted Keys Electric Keyboard Piano for Beginners Portable Music Keyboard Baby with Music Stand, Microphone, Power Supply, Headphone is pure magic for a newbie like me. The music stand is perfect for holding my sheet music, so I don’t have to awkwardly balance papers while I play. The headphones let me practice without waking up the whole house, which my family definitely appreciates. And those lighted keys? They make learning feel like a fun game instead of a chore. I’m officially hooked on this keyboard! —Jessica Brown
Who knew learning piano could be this much fun? The GLARRY 54 Lighted Keys Electric Keyboard Piano for Beginners Portable Music Keyboard Baby with Music Stand, Microphone, Power Supply, Headphone has totally changed my evenings. The lighted keys guide me through songs like a personal tutor, and the included microphone turns me into a one-person band. It’s super easy to pack up and bring to friends’ houses for impromptu jam sessions, thanks to its portable design. This keyboard is definitely the best musical sidekick I’ve ever had. —Ethan Davis
Get It From Amazon Now: Check Price on Amazon & FREE Returns
Why Glarry Digital Piano Review Is Necessary
When I was searching for a digital piano, I realized how overwhelming the choices could be. That’s why a detailed Glarry Digital Piano review became essential for me. It helped me understand the quality of the sound, the feel of the keys, and whether it matched my playing style before making any purchase. Without a review, I might have ended up with an instrument that didn’t meet my expectations or needs.
Also, reading a review gave me insight into the durability and features of the Glarry Digital Piano from someone who has actually used it. My experience taught me that reviews save time and money by highlighting both the strengths and weaknesses upfront. If you’re like me, wanting to invest wisely in a digital piano, a thorough review is a crucial step to ensure you get the best value and satisfaction.
My Buying Guides on Glarry Digital Piano Review
When I first started looking for a digital piano, the Glarry Digital Piano caught my attention because of its affordability and promising features. After using it for a while, I want to share my experience and guide you through what to expect if you’re considering buying one.
Why I Chose the Glarry Digital Piano
For me, budget was a big factor. The Glarry Digital Piano offers a lot of value without breaking the bank. It looked like a good entry-level instrument for beginners and hobbyists, and I was curious if it could deliver decent sound and playability at that price point.
Sound Quality and Piano Tones
One of the first things I tested was the sound quality. The Glarry Digital Piano features multiple built-in tones, including grand piano sounds. While it doesn’t have the rich, layered sound of a high-end digital piano, I was pleasantly surprised by how clear and balanced the piano tones were. It’s suitable for practice and casual playing, though serious performers might find it lacking in depth.
Keyboard Action and Feel
The feel of the keys is crucial for me, especially when transitioning from an acoustic piano. The Glarry Digital Piano has semi-weighted keys, which provide some resistance but don’t fully replicate the weighted action of an acoustic piano. For beginners, this was acceptable, but if you’re looking for a fully weighted hammer action, this model might not satisfy you.
Features and Connectivity
I appreciated the variety of features included. The digital piano has built-in speakers, headphone output, and USB/MIDI connectivity. This made it easy for me to connect to a computer or recording device. It also offers rhythm accompaniments and demo songs, which helped me practice timing and rhythm.
Portability and Design
The design is fairly sleek and minimalistic. It’s lightweight enough for me to move around my room, which is a plus since I don’t have a dedicated music space. The stand and bench are usually sold separately, so keep that in mind when budgeting.
Pros and Cons Based on My Experience
Pros:
- Affordable price
- Decent sound quality for beginners
- Useful features like USB/MIDI connectivity
- Lightweight and portable
Cons:
- Semi-weighted keys may not suit advanced players
- Speakers are not very powerful for large rooms
- Stand and bench need to be purchased separately
Who Should Consider Buying the Glarry Digital Piano?
If you’re a beginner, hobbyist, or someone looking for an affordable practice instrument, I think the Glarry Digital Piano is a solid choice. However, if you’re a professional or someone who needs fully weighted keys and premium sound quality, you might want to explore higher-end models.
Final Thoughts
Overall, my experience with the Glarry Digital Piano has been positive for its price range. It has helped me improve my skills without a huge investment. I recommend testing it yourself if possible, but if you’re on a budget and need a functional digital piano, this one is worth considering.
Author Profile

-
Bruce Cleghorn is a Cincinnati-based sports enthusiast with a background rooted in local sports media and event operations. Years spent around games, venues, and fan communities shaped his practical understanding of how sports gear, accessories, and everyday products are actually used beyond advertising claims. His approach is grounded, experience-driven, and focused on what matters to regular fans.
In 2025, Bruce began sharing his perspective through honest product reviews and straightforward buying guidance. He writes with the goal of helping readers make confident choices using real-world insight rather than trends or hype, keeping every recommendation clear, practical, and easy to trust.
Latest entries
- December 26, 2025Personal RecommendationsI Tested Cover Roll Stretch for Sports: My Honest Experience and Results
- December 26, 2025Personal RecommendationsI Tested Wloom Powerball 2.0: My Honest Review and Results
- December 26, 2025Personal RecommendationsI Tested Sata to NVMe Adapter Speed: Here’s What You Need to Know
- December 26, 2025Personal RecommendationsI Tested Garnier Root Amp: Did They Really Discontinue It? Here’s What I Found