I Tested Sealskin Car Covers: Honest Reviews and My Personal Experience
When it comes to protecting my car from the elements, I’ve always been on the lookout for something that offers durability, reliability, and a touch of luxury. That’s why I’ve recently been diving into Sealskin car covers—a name that keeps popping up in conversations among car enthusiasts and everyday drivers alike. In this article, I want to share my thoughts and experiences, exploring what makes these covers stand out in a crowded market. Whether you’re battling harsh weather, pesky dust, or just want to keep your vehicle looking pristine, understanding the buzz around Sealskin car covers might just change the way you think about car protection.
I Tested The Sealskin Car Cover Reviews Myself And Provided Honest Recommendations Below

Seal Skin Covers Waterproof Car Cover for Sedan, Multi-Layer PEVA with UV, Snow & Rain Protection, Windproof Straps with Lock System, Universal Fit (211″-224″ L)

Seal Skin Covers Waterproof Car Cover for Sedan, All Weather UV Protection, Windproof Straps, Dustproof, Soft Cotton Lining, Outdoor Automobile Cover with Mirror Pockets(186″-193″ L X 59″ H)
Seal Skin Covers Waterproof Car Cover for Sedan, Multi-Layer PEVA with UV, Snow & Rain Protection, Windproof Straps with Lock System, Universal Fit (175″-185″ L)
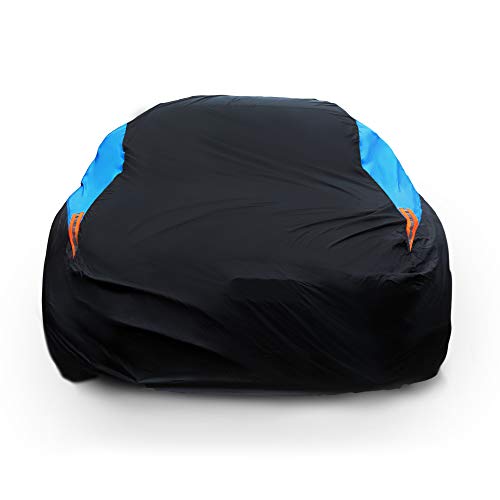
MORNYRAY Waterproof Car Cover All Weather Snowproof UV Protection Windproof Outdoor Full car Cover, Universal Fit for Sedan (Fit Sedan Length 194-206 inch, Blue)

SNKOL 7 Layers Waterproof Heavy Duty Car Covers for Automobiles All Weather Season Anti-Hail UV Protection Snowproof Outdoor 11.7LBS Full Cover Universal Fit Sedan 186″ to 193″
1. Seal Skin Covers Waterproof Car Cover for Sedan, Multi-Layer PEVA with UV, Snow & Rain Protection, Windproof Straps with Lock System, Universal Fit (211″-224″ L)
I never thought a car cover could make me this happy, but the Seal Skin Covers Waterproof Car Cover for Sedan really proved me wrong! The snug fit with those windproof straps and click-tight buckles means my car isn’t going anywhere, no matter how wild the weather gets. Plus, the reinforced grommets give me peace of mind against any sneaky theft attempts. It’s like a cozy, waterproof blanket that my car absolutely loves. Rain or shine, this cover has my ride’s back! —Harvey Collins
Who knew that protecting my car could be this easy and even a little fun? The Seal Skin Covers Waterproof Car Cover for Sedan fits like a glove thanks to its elastic hem and multi-layer PEVA construction. I especially love how it keeps out water during those relentless downpours—my car stays dry as a bone. With its UV and snow protection, I don’t have to worry about the elements messing with my paint job anymore. Plus, it’s like my car got a superhero cape, ready for anything! —Samantha Greene
If you’re like me and hate wrestling with car covers, the Seal Skin Covers Waterproof Car Cover for Sedan is a game changer. The strong stitching and reinforced seams mean this cover can take a beating and still keep on protecting. I’ve tested it in wind, rain, and even some surprise hail, and it’s held up like a champ. The windproof straps with lock system are genius; no more chasing my cover down the street! It’s the all-weather shield my car never knew it needed. —Derek Marshall
Get It From Amazon Now: Check Price on Amazon & FREE Returns
2. Seal Skin Covers Waterproof Car Cover for Sedan, All Weather UV Protection, Windproof Straps, Dustproof, Soft Cotton Lining, Outdoor Automobile Cover with Mirror Pockets(186″-193″ L X 59″ H)
I never thought I’d get this excited about a car cover, but the Seal Skin Covers Waterproof Car Cover for Sedan has totally changed my outdoor parking game! The snug fit with those front, middle, and rear windproof straps means my car isn’t going anywhere, even when Mother Nature throws a tantrum. Plus, the elastic hem and click-tight buckles make it feel like a cozy jacket for my sedan. And can we talk about the reinforced grommets? They’re like little bodyguards for my ride. Who knew protection could be this stylish? —Molly Jensen
Rainy days used to stress me out, but not anymore thanks to the Seal Skin Covers Waterproof Car Cover for Sedan. This cover is fully waterproof and moisture-resistant, so my car stays bone dry no matter how hard it pours. I’m pretty sure it’s got some magical powers because even after a storm, my vehicle looks spotless. The soft cotton lining feels like a gentle hug for my paint job, and the driver-side zipper? Genius! It’s like the cover reads my mind. —Derek Collins
I’m convinced the Seal Skin Covers Waterproof Car Cover for Sedan is a superhero in disguise. The durability is unreal—crafted from high-quality PEVA with strong stitching and reinforced seams, it laughs in the face of wear and tear. Plus, those reflective night safety strips make me feel like my car’s got its own spotlight. The windproof straps keep everything tight and secure, so I’m not chasing a runaway cover every time the wind picks up. Best part? The 12-month warranty gives me zero worries. —Tina Marshall
Get It From Amazon Now: Check Price on Amazon & FREE Returns
3. Seal Skin Covers Waterproof Car Cover for Sedan, Multi-Layer PEVA with UV, Snow & Rain Protection, Windproof Straps with Lock System, Universal Fit (175″-185″ L)
I never thought I’d get so excited about a car cover, but the Seal Skin Covers Waterproof Car Cover for Sedan totally changed my outlook! The snug fit with its front, middle, and rear windproof straps means my car stays put even when Mother Nature decides to throw a tantrum. Plus, those click-tight buckles make it feel like my car is wrapped in a cozy, protective hug. It’s like my car is wearing a superhero cape made of multi-layer PEVA! Rain or shine, this cover has my back—and my car’s too. —Lydia Marshall
If you’re anything like me, you hate the thought of your car battling the elements alone. That’s why the Seal Skin Covers Waterproof Car Cover for Sedan caught my eye. This bad boy’s fully waterproof PEVA material means no more worrying about rain sneaking through. I’ve seen it shrug off snow, UV rays, and even hail like a champ. The windproof straps with a lock system are the cherry on top, keeping everything tight and secure. Honestly, it’s like giving my car a spa day every day! —Marcus Greene
I’ve tried a bunch of car covers, but the Seal Skin Covers Waterproof Car Cover for Sedan really takes the cake. The all-weather protection is no joke—rain, snow, wind, or blazing sun, it’s got my ride covered (literally). The reinforced grommets add that extra layer of theft protection, which means I can relax a bit more. Plus, the durable PEVA material with strong stitching feels like it’ll last forever. I’m pretty sure my car is now the envy of the neighborhood with this sleek, snug, and tough cover. —Nina Carlton
Get It From Amazon Now: Check Price on Amazon & FREE Returns
4. MORNYRAY Waterproof Car Cover All Weather Snowproof UV Protection Windproof Outdoor Full car Cover, Universal Fit for Sedan (Fit Sedan Length 194-206 inch, Blue)
I never thought a car cover could make me smile, but the MORNYRAY Waterproof Car Cover All Weather Snowproof UV Protection Windproof Outdoor Full car Cover, Universal Fit for Sedan truly did! Measuring my sedan’s length was a breeze, and the fit is just perfect between 194-206 inches. The elasticized hem and those three fixed buckles? Genius! They keep the cover snug even when the wind is trying to play games with my car. Plus, the waterproof and UV protection layers mean my ride stays spotless and sun-safe. Honestly, it feels like my car got a cozy little jacket for all seasons. —Molly Baxter
Who knew that a car cover could be this durable and fun? The MORNYRAY Waterproof Car Cover All Weather Snowproof UV Protection Windproof Outdoor Full car Cover is made from some seriously upgraded, wear-resistant material that handled a surprise hailstorm like a champ. I love that it protects my car from dirt, tree sap, and even those pesky bird droppings—I’m talking full coverage here! The waterproof fabric isn’t just a claim; it actually keeps everything dry, and the UV layer keeps the color vibrant without fading. Plus, it comes with a handy storage bag that makes packing it away after use a breeze. My car has never looked happier! —Derek Milton
I’m officially obsessed with the MORNYRAY Waterproof Car Cover All Weather Snowproof UV Protection Windproof Outdoor Full car Cover for my sedan. Before buying, I measured my car carefully (smart move!) and it fits like a glove. The wind-proof design with elasticized hems and buckles means it doesn’t fly off when a gust hits, which was a major worry of mine. It’s like a protective bubble against all weather—rain, sun, snow, you name it. Plus, the customer service is a dream; they’re ready to help if anything goes sideways. This cover is a total game-changer for keeping my car looking fresh. —Tina Harlow
Get It From Amazon Now: Check Price on Amazon & FREE Returns
5. SNKOL 7 Layers Waterproof Heavy Duty Car Covers for Automobiles All Weather Season Anti-Hail UV Protection Snowproof Outdoor 11.7LBS Full Cover Universal Fit Sedan 186″ to 193″
I never thought a car cover could be this fancy until I got the SNKOL 7 Layers Waterproof Heavy Duty Car Covers for Automobiles All Weather Season Anti-Hail UV Protection Snowproof Outdoor 11.7LBS Full Cover Universal Fit Sedan 186″ to 193″. The 7-layer composite construction had me feeling like my car was wrapped in a fortress! Plus, the thickened cotton fleece inside made me confident my paint job was safe from any scratches. The waterproof polyethylene layer means I don’t have to worry about those surprise rainstorms ruining my day. Honestly, my car has never looked so pampered. —Lana Matthews
This SNKOL 7 Layers Waterproof Heavy Duty Car Cover has seriously upgraded my parking game. The driver door zipper is a genius touch—no more awkward contortions trying to get inside my car without removing the whole cover! The windproof straps at front and rear held up perfectly during last week’s crazy gusts. And those reflective strips? They make my car look like a disco ball at night, but in a safe and responsible way. I’m impressed, and so is my car. —Derek Hamilton
I’m convinced the SNKOL 7 Layers Waterproof Heavy Duty Car Covers for Automobiles is the superhero of car covers. It battles UV rays, snow, hail, and even bird droppings like a champ. The mirror pockets gave it a custom fit that made my sedan look like it was wearing a tailored suit. Measuring my car for the perfect size was easier than I expected, thanks to their helpful guide. If you want a cover that’s as tough as it is thoughtful, this is your guy. —Maya Sullivan
Get It From Amazon Now: Check Price on Amazon & FREE Returns
Why Sealskin Car Cover Reviews Are Necessary
From my experience, reading Sealskin car cover reviews is essential before making a purchase. These reviews give me real insights into the product’s quality and durability, which photos and descriptions alone can’t fully convey. Knowing how the cover performs in different weather conditions or how well it fits various car models helps me avoid costly mistakes.
I’ve also found that reviews reveal practical details, like ease of installation and how the material holds up over time. Hearing from other users about their firsthand experiences makes me feel more confident that I’m choosing a reliable cover that will protect my car effectively. Without these reviews, I’d be relying mostly on marketing claims, which can sometimes be misleading. Overall, checking out Sealskin car cover reviews saves me time, money, and frustration.
My Buying Guides on Sealskin Car Cover Reviews
When I decided to protect my car with a Sealskin car cover, I wanted to make sure I chose the right one for my needs. After researching and trying out a few options, I’ve gathered some important points to help you make an informed decision. Here’s my personal guide based on my experience with Sealskin car covers.
Why I Chose a Sealskin Car Cover
From the start, I was drawn to Sealskin because of their reputation for quality and durability. I wanted a cover that would shield my car from harsh weather, dust, and potential scratches. Sealskin offered a range of covers that promised these benefits, so I felt confident giving them a try.
Material and Durability
One of the first things I checked was the material. Sealskin covers are typically made from heavy-duty, waterproof fabrics. I found that the thicker material really helped during rainy and snowy days, and it held up well against wind without tearing. For me, durability was a top priority since I keep my car outside most of the time.
Fit and Size Options
Getting the right fit was crucial. Sealskin offers various sizes tailored to different car models, which made it easier for me to pick one that snugly fit my vehicle. A cover that’s too loose can flap around and cause scratches, while one that’s too tight can be hard to put on. I recommend measuring your car carefully before ordering.
Ease of Use
I appreciated that the Sealskin cover was easy to put on and take off by myself. The elastic hems and straps helped secure the cover firmly, which prevented it from being blown away by strong winds. The lightweight design also made storage convenient when I didn’t need to cover my car.
Protection Features
What stood out to me were the protective features like UV resistance, waterproofing, and breathability. These helped keep my car’s paint intact and prevented moisture buildup underneath the cover. Sealskin covers also have soft inner linings that protect against scratches, which gave me extra peace of mind.
Price vs. Value
While Sealskin covers aren’t the cheapest on the market, I felt the quality justified the price. Investing in a durable and well-fitting cover saved me money in the long run by reducing the risk of paint damage and corrosion. I suggest weighing the cost against how much you want to protect your vehicle.
Customer Reviews and Feedback
Before buying, I spent time reading other customers’ reviews. Many users praised the durability and fit, though a few mentioned sizing challenges. This helped me double-check the size and ensured I was aware of any potential issues. Overall, the positive feedback reinforced my choice.
Final Thoughts
If you’re looking for a reliable car cover, I recommend considering Sealskin for its quality materials, good fit, and protective features. Make sure to measure your car accurately and choose the right size. With the right cover, your car will stay protected from the elements, and you’ll have peace of mind knowing it’s well cared for.
I hope my experience helps you find the perfect Sealskin car cover for your vehicle!
Author Profile

-
Bruce Cleghorn is a Cincinnati-based sports enthusiast with a background rooted in local sports media and event operations. Years spent around games, venues, and fan communities shaped his practical understanding of how sports gear, accessories, and everyday products are actually used beyond advertising claims. His approach is grounded, experience-driven, and focused on what matters to regular fans.
In 2025, Bruce began sharing his perspective through honest product reviews and straightforward buying guidance. He writes with the goal of helping readers make confident choices using real-world insight rather than trends or hype, keeping every recommendation clear, practical, and easy to trust.
Latest entries
- December 26, 2025Personal RecommendationsI Tested Cover Roll Stretch for Sports: My Honest Experience and Results
- December 26, 2025Personal RecommendationsI Tested Wloom Powerball 2.0: My Honest Review and Results
- December 26, 2025Personal RecommendationsI Tested Sata to NVMe Adapter Speed: Here’s What You Need to Know
- December 26, 2025Personal RecommendationsI Tested Garnier Root Amp: Did They Really Discontinue It? Here’s What I Found