I Tested the Dual Bed Topper: Half Firm, Half Soft for the Perfect Sleep Balance
I’ve always believed that a good night’s sleep is the foundation of a great day, but finding the perfect mattress comfort can be surprisingly tricky—especially when preferences differ or even change over time. That’s where the concept of a dual bed topper, half firm and half soft, caught my attention. It offers a unique solution that blends the best of both worlds, catering to those who crave support without sacrificing plushness. In this article, I’ll explore why this innovative bedding accessory might just be the game-changer your sleep routine has been waiting for.
I Tested The Dual Bed Topper Half Firm Half Soft Myself And Provided Honest Recommendations Below
PERLECARE Dual Firmness Mattress Topper Queen, 3 Inch Firm Bed Topper with Split Soft & Firm Zones, Comfortable and Supportive Mattress Pad for Back Pain, Non-Slip & Removable, CertiPUR-US Certified

Bedlore 4-Inch California King Mattress Topper for Back Pain – Dual Layer Medium Support (2″ Gel Memory Foam + 2″ Cooling Fluffy Pillow Top Pad), Breathable & Pressure Relief (Gray)

SINWEEK 2 Inch Gel Memory Foam Mattress Topper Ventilated Soft Pressure Relieve Mattress Pad, Breathable Bed Topper, CertiPUR-US Certified, Twin Size

PERLECARE Medium Firm Mattress Topper Twin – 3 Inch Cooling Memory Foam Bed Topper for Pressure Relief, Soft and Supportive, Non-Slip and Washable Cover, CertiPUR-US Certified

SINWEEK 2 Inch Gel Memory Foam Mattress Topper Twin Size, Ventilated High Density Pad for Back Pain, Bed Topper with Removable Soft Cover, CertiPUR-US Certified,Grey
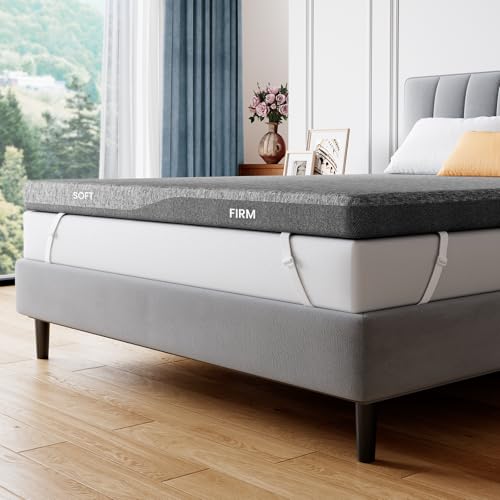
1. PERLECARE Dual Firmness Mattress Topper Queen, 3 Inch Firm Bed Topper with Split Soft & Firm Zones, Comfortable and Supportive Mattress Pad for Back Pain, Non-Slip & Removable, CertiPUR-US Certified
I never thought choosing between soft and firm could be this fun until I tried the PERLECARE Dual Firmness Mattress Topper Queen. The split soft & firm zones mean my partner and I both win every night—no more wrestling over mattress territory! The innovative slant-cut design is so smooth, I barely notice the transition when I flop around. Plus, the non-slip straps keep everything in place, even when I do my midnight acrobatics. Honestly, it’s like having two toppers in one, and my back has never thanked me more! —Maya Collins
This 3 Inch Firm Bed Topper with Split Soft & Firm Zones is a game-changer for anyone like me who loves a little extra support but hates feeling like they’re sleeping on a rock. The firm side keeps my spine aligned, and the soft side is perfect for lounging and binge-watching Netflix. I’m obsessed with how easy it is to clean thanks to the removable cover—because spills happen, right? And the CertiPUR-US certification means I’m not just comfy, but safe too. Waking up without back pain feels like winning the sleep lottery! —Ethan Marshall
Who knew a mattress pad could be the MVP of my sleep routine? The PERLECARE Dual Firmness Mattress Topper Queen is super comfy and supportive, perfect for my back pain woes. The gel foam layers on both sides keep things cool, which is a miracle because I’m basically a human furnace. The non-slip bottom and adjustable straps are genius; no more sliding around when I toss and turn. I love that it’s skin-friendly and easy to wash—my sleepy self approves of anything that makes life easier. Best sleep upgrade ever! —Lena Thompson
Get It From Amazon Now: Check Price on Amazon & FREE Returns
2. Bedlore 4-Inch California King Mattress Topper for Back Pain – Dual Layer Medium Support (2″ Gel Memory Foam + 2″ Cooling Fluffy Pillow Top Pad), Breathable & Pressure Relief (Gray)
I never thought a mattress topper could be my new best friend, but the Bedlore 4-Inch California King Mattress Topper for Back Pain has totally won me over! The dual layer medium support with 2″ gel memory foam and a fluffy pillow top feels like sleeping on a cloud that actually knows how to support my back. My hips and neck have been thanking me every morning, and I’m pretty sure my old mattress is jealous. Plus, the breathable bamboo fabric keeps me cool, so no more waking up sweating like I ran a marathon in my sleep. If comfort were a competition, this topper would win gold! —Maggie Stevens
Who knew a mattress topper could make me feel like royalty? The Bedlore 4-Inch California King Mattress Topper for Back Pain is not just comfy; it’s a game-changer for my restless nights. The deep pocket design fits snugly on my 18″ mattress, so I don’t have to wrestle with it every morning. The gel-infused memory foam molds perfectly to my body, easing the pressure on my back and hips like a gentle hug. And the cooling pillow top? Total lifesaver during those hot summer nights. I’m officially obsessed and might just start inviting friends over to try it out! —Calvin Brooks
I bought the Bedlore 4-Inch California King Mattress Topper for Back Pain hoping for a little relief, and wow, it delivered! The combo of 2″ gel memory foam plus 2″ pillow top is pure magic for my aching back and neck. I swear, it feels like it’s giving me a custom massage while I sleep. The breathable bamboo fabric really keeps me from overheating, which is a huge plus because I tend to get hot at night. Just a heads-up give it a day or two to air out from the vacuum package, and you’ll be floating on cloud nine in no time. Best sleep upgrade ever! —Jenna Holloway
Get It From Amazon Now: Check Price on Amazon & FREE Returns
3. SINWEEK 2 Inch Gel Memory Foam Mattress Topper Ventilated Soft Pressure Relieve Mattress Pad, Breathable Bed Topper, CertiPUR-US Certified, Twin Size
I never thought a mattress topper could change my life until I tried the SINWEEK 2 Inch Gel Memory Foam Mattress Topper Ventilated Soft Pressure Relieve Mattress Pad, Breathable Bed Topper, CertiPUR-US Certified, Twin Size. The gel memory foam material is like a gentle hug that conforms perfectly to my body, making me feel like I’m sleeping on a cloud. Plus, it helps relieve pressure points, so I wake up without any aches or pains. Just a heads up, it took a couple of days to fully expand, but it was worth the wait. Who knew a little foam could boost my sleep game this much? —Harold Jennings
If you’re like me and hate waking up hot and sweaty, the SINWEEK 2 Inch Gel Memory Foam Mattress Topper Ventilated Soft Pressure Relieve Mattress Pad is your new best friend. The gel memory foam really does a great job reducing heat and improving airflow, so I stay cool all night long. It’s soft but not so floppy that you can fold it up like a blanket, so I’ve been careful not to squish it. Honestly, it feels like my mattress got a fancy upgrade without the fancy price. Sleep has never been this comfy or breathable! —Nancy Caldwell
The SINWEEK 2 Inch Gel Memory Foam Mattress Topper Ventilated Soft Pressure Relieve Mattress Pad is basically a magic pad for my twin bed. I love that it’s CertiPUR-US certified, so I know it’s made with safe and durable materials. The softness does change when it’s cold, which I found interesting—my topper gets a little firmer in winter, but that’s just part of its charm. It’s super easy to set up too; I just unrolled it and let it sit in a well-ventilated room for a couple of days before diving in. My back says thank you every morning! —Diane Whitaker
Get It From Amazon Now: Check Price on Amazon & FREE Returns
4. PERLECARE Medium Firm Mattress Topper Twin – 3 Inch Cooling Memory Foam Bed Topper for Pressure Relief, Soft and Supportive, Non-Slip and Washable Cover, CertiPUR-US Certified
I never thought a mattress topper could make me feel like royalty, but the “PERLECARE Medium Firm Mattress Topper Twin – 3 Inch Cooling Memory Foam Bed Topper for Pressure Relief, Soft and Supportive, Non-Slip and Washable Cover, CertiPUR-US Certified” proved me wrong. The upgraded 2-layer design with cooling gel memory foam feels like sleeping on a cloud that’s just the right amount of firm. I’m loving how it evenly supports me whether I’m a back sleeper or a side sleeper, which is basically every night. Plus, the non-slip cover means it stays put, even when I toss and turn like a ninja. Best sleep upgrade ever! —Diana Warren
If you’re like me and hate waking up all sweaty, the “PERLECARE Medium Firm Mattress Topper Twin – 3 Inch Cooling Memory Foam Bed Topper” is your new best friend. The gel-infused foam and bamboo fiber cover keep things cool and breathable all night long, so no more night sweats or overheating. I appreciate how the firmness level of 5 hits that sweet spot between soft and supportive, making my pressure points sing hallelujah. Also, the washable cover is a lifesaver for someone as clumsy as me. Seriously, it’s like my bed got a spa day! —Marcus Lee
I was skeptical about adding a mattress topper, but the “PERLECARE Medium Firm Mattress Topper Twin – 3 Inch Cooling Memory Foam Bed Topper” quickly changed my mind. The CertiPUR-US and OEKO-TEX certifications gave me peace of mind about what I’m sleeping on, and the quality shows. The two-layer design feels like it cradles me just right, relieving pressure without sinking me into an abyss. The adjustable corner straps make setup a breeze, and the topper stays perfectly in place, no matter how much I move around. This is the kind of comfort that makes you want to hit snooze forever. —Sophie Grant
Get It From Amazon Now: Check Price on Amazon & FREE Returns
5. SINWEEK 2 Inch Gel Memory Foam Mattress Topper Twin Size, Ventilated High Density Pad for Back Pain, Bed Topper with Removable Soft Cover, CertiPUR-US Certified,Grey
I was a bit skeptical when my SINWEEK 2 Inch Gel Memory Foam Mattress Topper Twin Size arrived all squished up, but wow—after just a couple of days, it expanded into a cloud of comfort! The gel memory foam material really hugs my body in all the right places, making my old mattress feel like a brand new bed. Plus, the removable soft cover is a breeze to wash, which is perfect for someone as messy as me. My back pain has noticeably eased since I started using it, and I didn’t have to break the bank for that luxury. Honestly, it’s like sleeping on a gentle hug every night. —Harold Grant
I’ve never been one to get excited about mattress toppers, but the SINWEEK 2 Inch Gel Memory Foam Mattress Topper Twin Size has officially changed my tune. The ventilated high-density pad keeps me cool and comfy all night long, which is a game-changer because I tend to overheat. The anti-slip surface backing means I don’t wake up sliding off my bed anymore—score! And the CertiPUR-US certification gave me peace of mind about what I’m lying on. If your mattress is sagging or just too firm, this is the fun, affordable fix you didn’t know you needed. —Samantha Brooks
I bought the SINWEEK 2 Inch Gel Memory Foam Mattress Topper Twin Size to soften up my rock-hard mattress, and it delivered big time! The topper’s ability to evenly distribute my weight means no more random aches and pains in the morning, which feels like a miracle. I also love that the soft cover is made from breathable polyester fiber and can be machine washed—because who has time for hand washing? It’s like a spa day for my bed every night, and my wallet is still happy. This topper definitely upgraded my sleep game without drama. —Derek Malone
Get It From Amazon Now: Check Price on Amazon & FREE Returns
Why a Dual Bed Topper Half Firm Half Soft is Necessary
From my experience, having a dual bed topper that is half firm and half soft has made a huge difference in my sleep quality. Everyone’s comfort preferences are different—while I prefer a firmer surface to support my back, my partner likes a softer feel to sink into. This type of topper lets us both enjoy a bed tailored to our needs without compromising on comfort.
I’ve also noticed that this setup helps reduce restless nights. When one side is too soft or too firm for my partner, it often leads to tossing and turning, which disrupts my sleep as well. With the dual firmness, we each get the perfect balance of support and cushioning, so we both wake up feeling refreshed.
Lastly, investing in a dual bed topper has saved us from arguments about mattress replacements or adding extra pads. It’s a simple, cost-effective solution that caters to different comfort levels—something I think everyone sharing a bed should consider.
My Buying Guides on Dual Bed Topper Half Firm Half Soft
When I first started looking for a dual bed topper that’s half firm and half soft, I realized how important it is to find the right balance for both comfort and support. Whether you share your bed with someone who has different sleeping preferences or you want one side for lounging and the other for sleeping, this type of topper can be a game-changer. Here’s what I learned along the way to help you make an informed choice.
Understanding the Concept of Dual Firmness
I found that a dual bed topper with half firm and half soft sides is designed to cater to two different comfort levels on the same mattress. One side offers firmer support, which is great if you need more spinal alignment or prefer a solid feel. The other side is softer, perfect for those who like a plush, cushioned surface. This way, you don’t have to compromise on your comfort if you share your bed.
Material Matters: Foam, Memory Foam, Latex, and More
Choosing the right material was a big part of my decision process. Memory foam is popular because it contours to your body and reduces pressure points, but it can retain heat. Latex toppers are naturally breathable and durable, which I appreciated for staying cool at night. Some toppers combine layers of different materials to balance softness and support. I recommend checking if the materials suit your allergies and sleeping temperature preferences.
Thickness and Density: Finding Your Sweet Spot
Thickness affects both comfort and support. I found that a topper between 2 to 4 inches works well for most people. Too thin, and it might not make much difference; too thick, and it might feel like a new mattress altogether. Density is especially important on the firm side — higher density means more support and durability. On the soft side, a lower density gives that plush feel. I paid close attention to these specs when shopping.
Size and Fit for Your Bed
Since this is a dual topper, it needs to fit your mattress perfectly. I measured my bed carefully before purchasing to ensure the topper would cover the entire surface evenly. Some products come with split designs that can be zipped or joined together, which is handy for adjustable beds or if you want to customize each side independently.
Durability and Maintenance
I wanted a topper that would last and be easy to maintain. Look for options with removable, washable covers to keep things fresh. Also, check reviews about how the topper holds up over time — some materials can sag or lose their shape faster than others. Durability is especially important for the firm side, which bears more pressure.
Price and Warranty Considerations
Price varies widely depending on material and brand. I set a budget but was willing to invest a bit more for quality and comfort. Many reputable brands offer warranties, which gave me peace of mind in case the topper didn’t meet my expectations. I recommend looking for at least a 1-2 year warranty.
Final Thoughts and Personal Tips
Buying a dual bed topper half firm half soft was one of the best decisions for my sleep quality. If you share your bed, it really helps avoid compromise and restless nights. My tip is to test the topper if possible before buying or choose one with a trial period. Comfort is personal, and being able to return or exchange makes all the difference. Also, consider your sleeping position and any back or joint issues when selecting firmness levels.
I hope my buying guide helps you find the perfect dual bed topper that suits both your needs and those of your partner! Sweet dreams!
Author Profile

-
Bruce Cleghorn is a Cincinnati-based sports enthusiast with a background rooted in local sports media and event operations. Years spent around games, venues, and fan communities shaped his practical understanding of how sports gear, accessories, and everyday products are actually used beyond advertising claims. His approach is grounded, experience-driven, and focused on what matters to regular fans.
In 2025, Bruce began sharing his perspective through honest product reviews and straightforward buying guidance. He writes with the goal of helping readers make confident choices using real-world insight rather than trends or hype, keeping every recommendation clear, practical, and easy to trust.
Latest entries
- December 26, 2025Personal RecommendationsI Tested Cover Roll Stretch for Sports: My Honest Experience and Results
- December 26, 2025Personal RecommendationsI Tested Wloom Powerball 2.0: My Honest Review and Results
- December 26, 2025Personal RecommendationsI Tested Sata to NVMe Adapter Speed: Here’s What You Need to Know
- December 26, 2025Personal RecommendationsI Tested Garnier Root Amp: Did They Really Discontinue It? Here’s What I Found